Community
Nebula Contributor | How to Be a GitHub Contributor in Five Minutes

Contribute to your first open source project in just five minutes with the help of NebulaGraph.
Preface
If you don't have a GitHub account, or aren't sure what Git is, please refer to the official website first.
How to Be a GitHub Contributor
Fork

Fork the NebulaGraph repo by clicking on the fork button on the top of the main page. This will create a copy of this repository in your account.
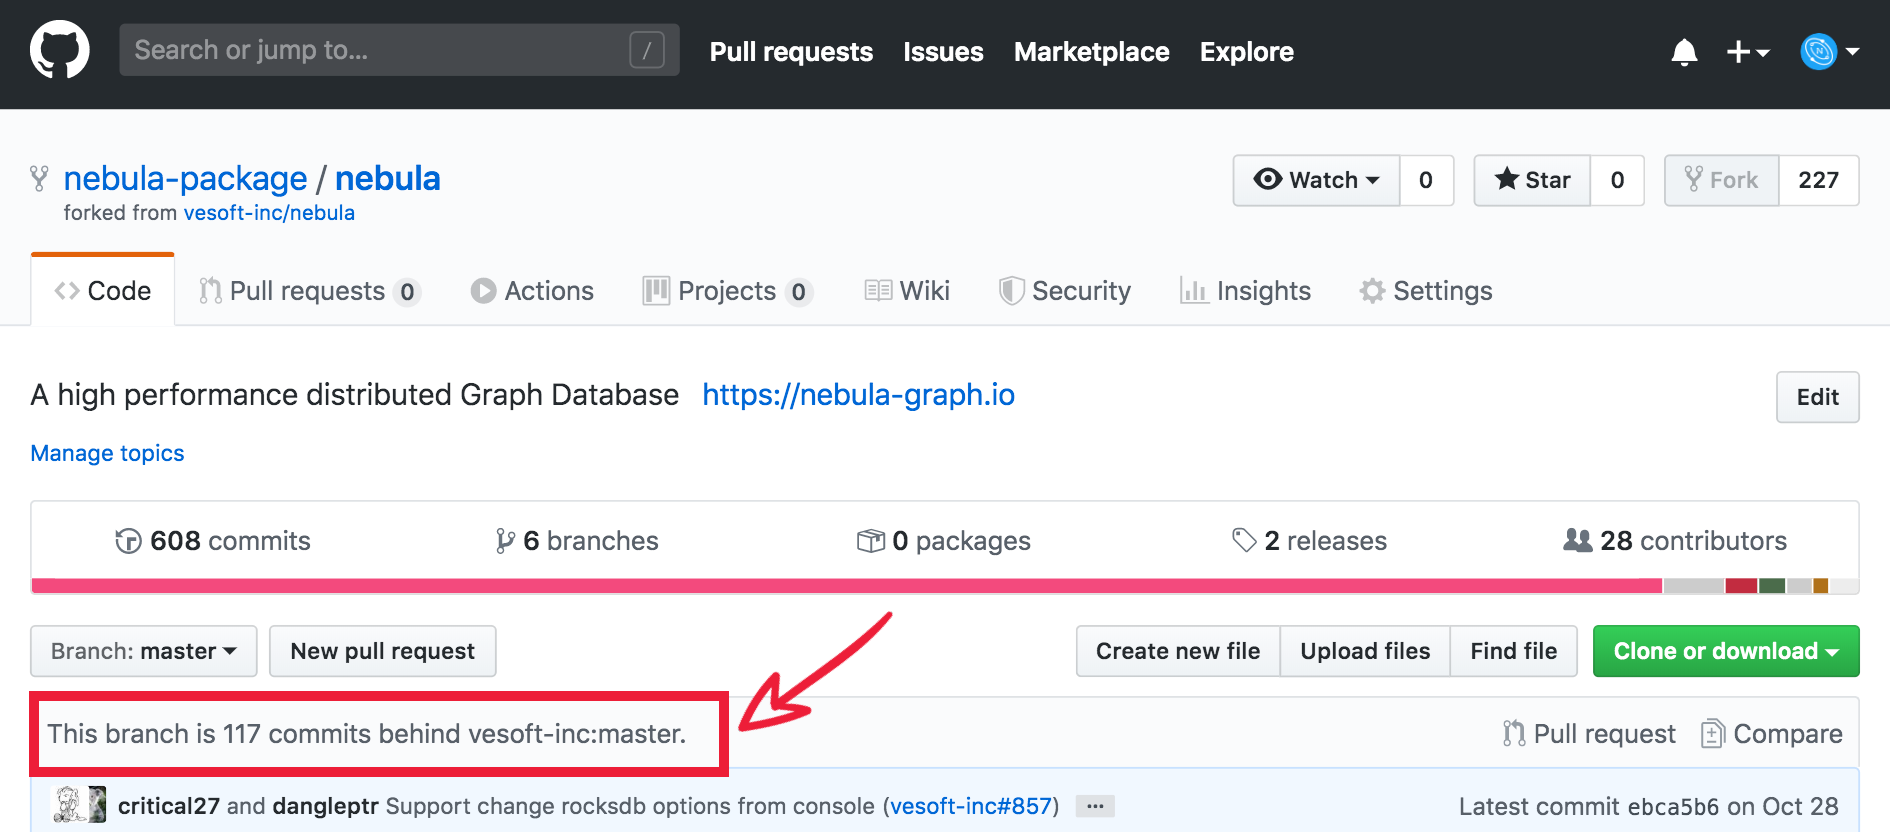
Fork Completed
You can see nebula repository is in your repository list. Please be noted the information This branch is 117 commits behind vesoft-inc:master., which indicates the deference between your branch and the master. If you just forked the repository, the information is This branch is even with vesoft-inc:master.
Clone the Repository
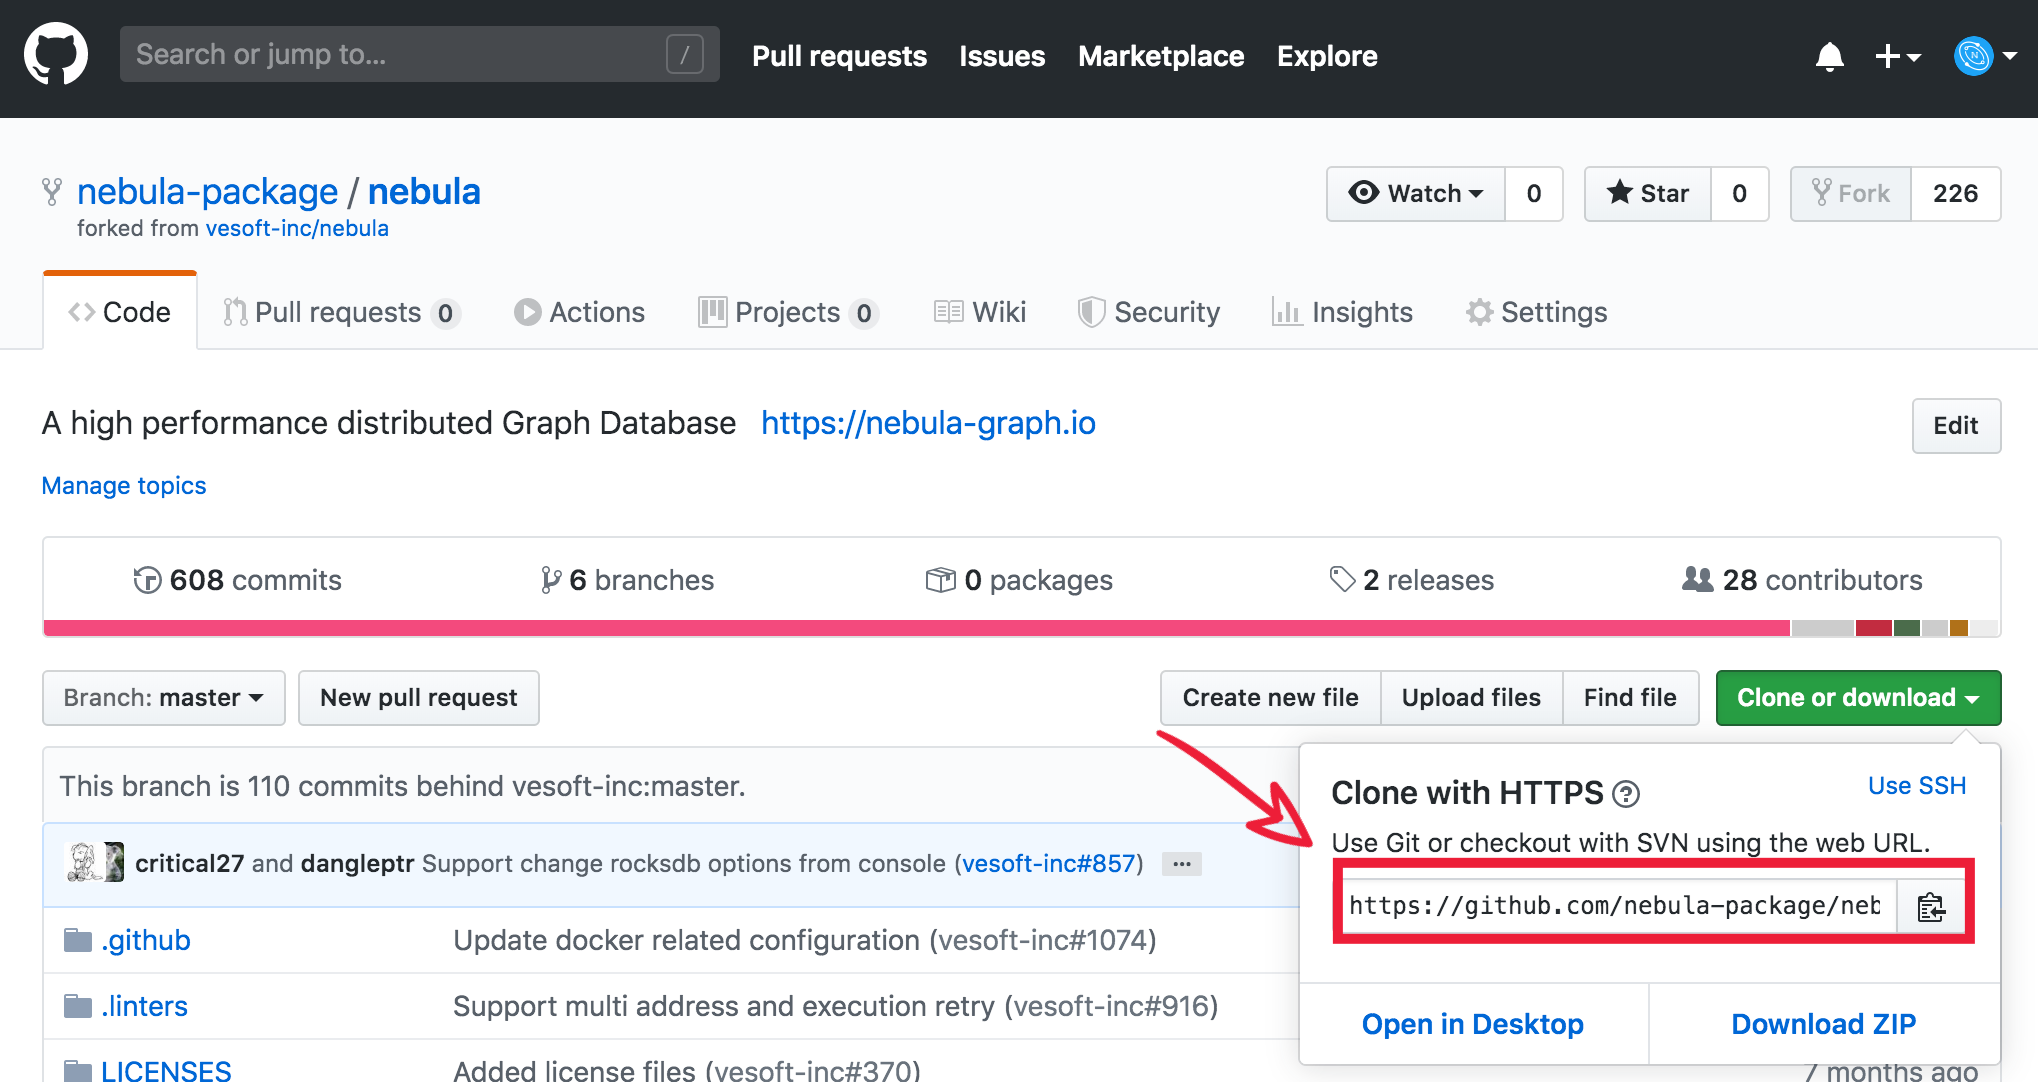
Clone the repository to your local machine. Click the Clone or download button then click the _copy to clipboard_ icon. Your remote repo on Github is called origin.
Open a terminal and run the following git command:
~ git clone "url you just copied"
where “url you just copied” (without the quote marks) is the url to the NebulaGraph repository. See the previous picture to obtain the url. For example:
~ git clone git@https://github.com/nebula-package/nebula.git
where nebula-package is the user name.
# Add upstream
~ cd $working_dir/nebula
~ git remote add upstream https://github.com/vesoft-inc/nebula.git

# Never push to the upstream master since your don't have the write access
~ git remote set-url --push upstream no_push

# Confirm that your remotes make sense:
# The right format is:
# origin    git@github.com:$(user)/nebula.git (fetch)
# origin    git@github.com:$(user)/nebula.git (push)
# upstream  https://github.com/vesoft-inc/nebula (fetch)
# upstream  no_push (push)
~ git remote -v
Define a Pre-Commit Hook
Please link the NebulaGraph pre-commit hook into your .git directory. This hook checks your commits for formatting, building, doc generation, etc.
~ cd $working_dir/nebula/.git/hooks
~ ln -s ../../cpplint/bin/pre-commit.sh .
Create a Branch
Switch to the NebulaGraph repository directory and create a new branch named myfeature to work on!
~  cd nebula

// If you created your fork a while ago be sure to pull upstream changes into your local repository.
~ git fetch upstream
~ git checkout master
~ git rebase upstream/master

// Create a branch from master and switch to your branch
~ git checkout -b myfeature
Code and Documentation Style
You can implement/fix your feature, comment your code in your myfeature branch now. Please follow the Google C++ Style Guide style and Documentation Style Guide.
We are using the clang-format to format the code. It is recommended that you configure it according to the IDE/editor you use. The following links show how to configure clang-format with vim/emacs/vscode.
vim:
https://github.com/rhysd/vim-clang-format
emacs:
https://github.com/llvm-mirror/clang/blob/master/tools/clang-format/clang-format.el
vscode:
https://code.visualstudio.com/docs/cpp/cpp-ide#_code-formatting
Develop
Edit your code and commit the changes with the following command.
~ git commit -m 'new feature'
Push Changes to GitHub
When ready to review (or just to establish an offsite backup or your work), push your branch to your fork on github.com:
~ git push -f origin myfeature
Create Pull Request
- Visit your fork at
https://github.com/$user/nebula(replace $user obviously). - Click the
Compare & pull requestbutton next to yourmyfeaturebranch.
Get a Code Review
Once your pull request has been opened, it will be assigned to at least two reviewers. Those reviewers will do a thorough code review to ensure the changes meet the repository's contributing guidelines and other quality standards.
Once the pull request is approved and merged you can pull the changes from upstream to your local repo and delete your extra branch(es).
How to be NebulaGraph Contributor
You can become a NebulaGraph contributor by contributing code or documentation. This section shows you how to raise doc pr to be our contributor. The follow picture shows the doc toc and you can make changes in any of the .md doc files. Consider the _Get Started_ doc as example.
Example: Get Started

The above picture shows the change log of the doc. You can add details, fix errors or even rewrite the whole doc to make it more organized and readable.
Please refer to the Documentation Toc to see all the NebulaGraph docs.
Last but not least, you are welcome to try NebulaGraph at our GitHub Repository. If you have any problems or suggestions please raise us an issue.